Reading/language arts: Author & Illustrate Haiku Poems*
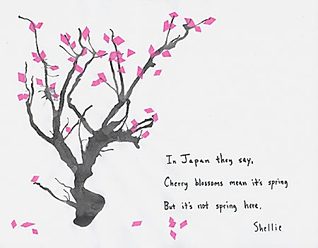
Haiku poetry is a Japanese form of poetry that paints a picture of nature using very few words. Haiku is a strict form in Japan with only 17 syllables in all with three lines of 5 - 7 - 5 syllables respectively. Your assignment does not have to be as restrictive.
A great read aloud book to introduce this activity is Crow Boy, by Taro Yashima.
In the Eyes of the Cat by Demi is filled with haiku poems for children to share before they begin writing their own.
Pre-Writers: Copy a poem from the board. Draw a picture to go along with it.
Beginning Writers: Copy the first line of a haiku poem and complete it on your own. Illustrate it.
Experienced Writers: Write your own haiku poems about favorite nature subjects. Illustrate them when you are done.
*This activity was taken from Using Literature to Learn About Children Around the World, page 29.
Math: creating Symmetrical design of Hopi Baskets
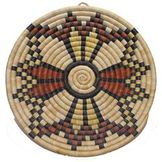
Fiftteen hundred years ago the Anasazi, a Native American tribe living in the Southwest, were weaving flat coilet baskets. Today their descendants, the Hopi of northern Arizona, continue the tradition. Symmetry can be found in many Native American objects.
Examine samples of Hopi baskets to determine their type of symmetry. Procedure provided below can be done together as a class if the students are younger. Older students can work together in small groups or individually.
1. Line or bilateral symmetry: Can you draw a line that will divide the basket into two matching parts, so that one half is a mirror miage of the others: How many such lines can be drawn? This number if the order of bilateral symmetry.
2. Turn or notational symmetry: Place your fingertip of pencil point on the center of the basket.Turn slowly until the pattern looks the same as when you started. In how many different positions does the design appear to the the same, counting the starting position? This number is the order of rotational symmetry.
Have students create their own symmetrical basket design using a cardboard circle cutout and pieces of colored construction paper.
science: making dyes from natural products
Natural dyes were the first dyes used to textile products such as fabric or yarn since the mid-18th century. Brights color are prevelant today in India. Have students research different countries to discover what fabrics and colors are unique to different countries.
Before there were chemical dyes, people had to make natural dyes from plant
materials. Students will dye their own two squares of material . Allow each student to select their own method and colors from selection provided. Sew one square together to make a class quilt wall hanging. Students can take home the other square to share with family.
What you will need: Wool or cotton material (cut into squares), laundry detergent, a variety of colorful plant material (suggestions below), knife, class bowls, water, old saucepans, sieve, Alum (available in the spice rack at grocery stores), dye.
You'll need adults to help you with the cutting and boiling in this project.
Step 1: Wash cotton or wool material in plain detergent with no fabric softener.
Step 2: Cut up your plant materials. Chop up or crush hard materials such as roots. Soak them overnight in a glass or enamel bowl with just
enough water to cover them.
Step 3: Pour the contents of the bowl into a stainless steel pan. Bring to a boil on the stove and simmer gently for about one hour. Check it
frequently and add water when needed.
Step 4: Strain the dye through a sieve to remove plant material. Allow the liquid to cool.
Step 5: Measure the liquid. For every quart of dye, add one half ounce of alum (about one tablespoon). Alum is a mordant. That means it
helps set the dye.
Step 6: Wet your fabric and wring it out, then put it in the steel pan with your dye. Put the pan on the stove and simmer slowly until the
fabric is just a little darker than you want it. (The fabric will look lighter when it dries.) Remember that natural colors will be soft, not bright.
Step 7: Move the pan to the sink and pour everything through a strainer. Run a little cold water over your fabric to cool and rinse it, wring
it out, and hang it up to dry outdoors where the drips won't hurt anything.
Here are some of the colors you can make from nature:
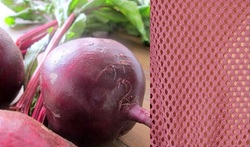
Yellow: onion skins, goldenrod flowers, carrots; Pink: red onions, rasberries; Rose: beets; Brown: coffee, nut hulls; Green: grass, spinach.
Before there were chemical dyes, people had to make natural dyes from plant
materials. Students will dye their own two squares of material . Allow each student to select their own method and colors from selection provided. Sew one square together to make a class quilt wall hanging. Students can take home the other square to share with family.
What you will need: Wool or cotton material (cut into squares), laundry detergent, a variety of colorful plant material (suggestions below), knife, class bowls, water, old saucepans, sieve, Alum (available in the spice rack at grocery stores), dye.
You'll need adults to help you with the cutting and boiling in this project.
Step 1: Wash cotton or wool material in plain detergent with no fabric softener.
Step 2: Cut up your plant materials. Chop up or crush hard materials such as roots. Soak them overnight in a glass or enamel bowl with just
enough water to cover them.
Step 3: Pour the contents of the bowl into a stainless steel pan. Bring to a boil on the stove and simmer gently for about one hour. Check it
frequently and add water when needed.
Step 4: Strain the dye through a sieve to remove plant material. Allow the liquid to cool.
Step 5: Measure the liquid. For every quart of dye, add one half ounce of alum (about one tablespoon). Alum is a mordant. That means it
helps set the dye.
Step 6: Wet your fabric and wring it out, then put it in the steel pan with your dye. Put the pan on the stove and simmer slowly until the
fabric is just a little darker than you want it. (The fabric will look lighter when it dries.) Remember that natural colors will be soft, not bright.
Step 7: Move the pan to the sink and pour everything through a strainer. Run a little cold water over your fabric to cool and rinse it, wring
it out, and hang it up to dry outdoors where the drips won't hurt anything.
Here are some of the colors you can make from nature:
Yellow: onion skins, goldenrod flowers, carrots; Pink: red onions, rasberries; Rose: beets; Brown: coffee, nut hulls; Green: grass, spinach.
Social studies: You are a World detective

Teacher provides the class with a object, something they can experience with their senses. Allow students time to look at object, touch it, feel it, and even smell it.
Students must determine what the object is and provide answers to the learning objectives that the teacher has provided.
Sample questions could be similar to the following:
Where can this be found? What does it represent? Why is it important to the culture?
Teacher will provide clues and scaffolding as needed to help them along their journey of discovery. Students should also have access to research materials, computers, etc. After the item has named, they should do research to find the answers to questions given. Students share with the class what they have learned.
Objects can be as simple as a bag of rice or beans or an ususal piece of fruit. Great objects for older students might include Russian nesting dolls and celadon pottery from Korea.
